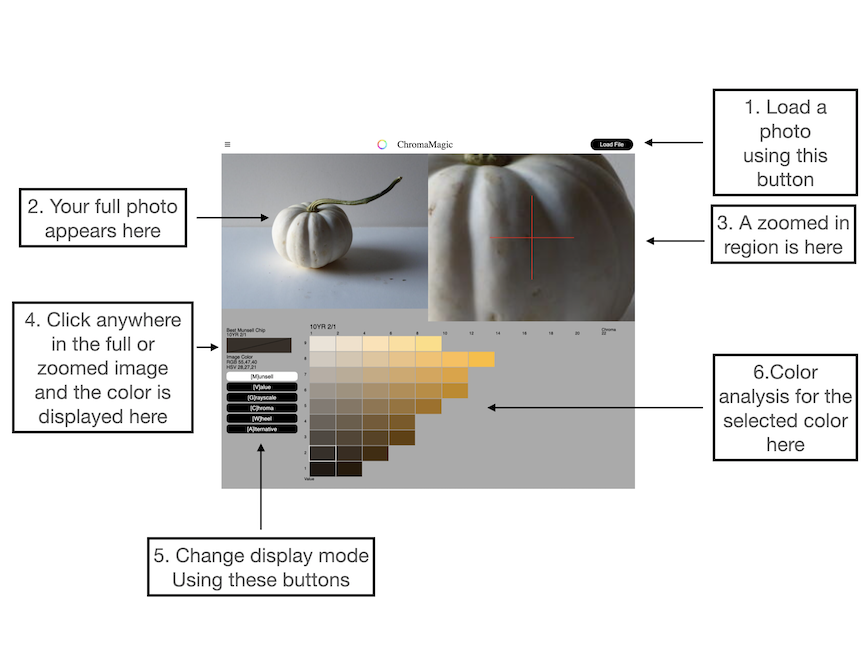
When you first load ChromaMagic you’ll see a screen similar to the one above. The image displayed is just for illustration purposes.
1. The Load Button

To load your own photo click the big black ‘Load File‘ button in the top right hand corner. You’ll be given the option to load an image from your phone’s photo gallery or a file on your desktop.
2. The Main Image Panel

The top left panel will display your full photo. You can click anywhere in here to select a color.
3. The Zoom Panel

When you click in the image panel the zoom panel will show a zoomed in region around the selected pixel. If you want more precision in selecting a color click anywhere on the zoom panel where you can also select a color.
4. Color Panel

In the bottom left panel you’ll see the selected color displayed in the bottom triangle. In the top triangle you’ll see the closest Munsell chip to your selected color.
5. Mode Buttons

Click the links in the list to find out more about each different display mode.


6. Analysis display
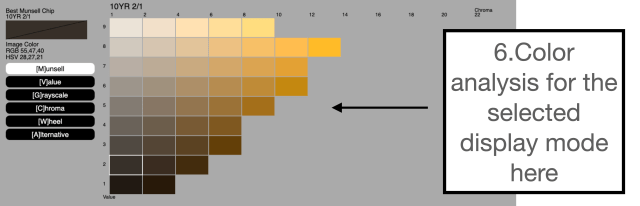
Depending on which display mode is selected the bottom right hand panel will show you the results of the selected color. Again, click on the display mode links to find out what each analysis display will show you.