Today’s class was on watercolor portraits. Portrait painting is probably one of the hardest subjects and when you’re using watercolor there is nowhere to hide your mistakes. Having said that it is enormously rewarding and seeing a face come alive through paint is a magical experience.
A Value Scale is one of the best tools for improving your painting
We were concentrating on values for this lesson and spent the first 30 minutes practicing painting value swatches. An accurate value scale is a necessity for this and the best one I’ve found is one from Paul Centore (buy here from eBay). I highly recommend you get one if you’re serious about getting your values right. It’s durable and wipe clean and it’s a step value scale with half values which not many scales have. Even though it’s grayscale you can also use it for assessing color value. Squinting or half closing your eyes will take the color out of a swatch to make it easier to assess value. If you’re really serious about color a Munsell book is the best thing but it’s expensive and you can get a long way with just this. If you want to know more about Munsell see this post. I also have an online tool ChromaMagic to help you see color more accurately.
Sign up for updates on classes and free livestreams
The best easy watercolor exercise to get better at mixing values or tones
This is a simple and easy beginner watercolor exercise and of all the watercolor exercises it reaps the most rewards. After only one week my value mixing ability improved 10 fold. Not bad for 10 minutes work a day! Before that it was a mixture of guesswork and luck whether I’d get a value right or not. If you feel your value work needs improvement I highly recommend this. Even a few sessions will have a big effect.
We focus purely on value here. It’s not a technique as such and you don’t have to worry about drawing complex shapes or how you apply the paint. No fancy gradients or washes here – it’s values all the way.
Exercise Steps:
I suggest you start with a mid value 5 and work on that before moving to others. In fact being able to mix a mid value reliably and reproducibly helps you mix all the others.
Draw a 1 inch square box on some practice paper (you don’t need the good watercolor paper for this).
Mix together ultramarine and burnt sienna with a damp brush. Keep the water to a minimum at this point. Only include enough so the paint is fluid but not runny.
Add some water so the paint is about the consistency of light cream. Paint a test dab on your student paper. Wait a few seconds so the paint has time to dry a little (it will lighten as it dries). Then bring in your value scale right next to the test dab and move squares along until you identify the right value.
How close is your value to the value 5 you’re aiming for? If it’s too dark your paint needs a little more water. If it’s too light you need a little less.
Clean your palette and mix again and try another test dab. Repeat until you get it bang on. The first time you do this it will take a few goes but you’ll get a lot faster surprisingly quickly.\
When you feel you have the right value fill in your square box
Repeat with a new box 3 or 4 times.
Another great exercise to improve values is to paint a simple white cube. I describe this on my tutorials page here.
Watercolor Value Scale Exercise
Paint consistency is the key
The key to getting this right is remembering the consistency of the paint on your palette. If you’ve been painting for a while you’ll know that how the paint looks on the palette bears no resemblance to how it will look on the paper. The consistency is pretty much the only thing we can use. When I mix the consistency of a value 5 is of light cream. Not heavy cream (that’s a 4 or a 3), and not milk (that’s a 7), and not water (that’s a 9). When you’ve hit the right consistency try and remember how that paint feels on the palette. Push it around a bit so you get a feel for how it moves.
White paper affects how we perceive value
When you first start to do this you’ll probably be surprised how dark a mid value looks on the paper. As usual we watercolor painters are at a disadvantage here. We work on white paper and pretty much any value you put down looks dark. Try and impress on your memory how that mid value looks next to white paper. This will stop you from having washed out watercolor paintings that are all up the top end of the value scale. (Unless you want to do that of course – but now you can do it intentionally) The paintings and scenes you create will have more contrast and impact and if you work with the full value range from white to black you have more room for the different values to show form.
Practice on values from the rest of the scale
When you’ve mastered the mid value try a few others – a 7 and a 3 are good to have knowledge of. If you can mix those three reliably you can easily modify to get the intermediate values. A little more water (and it can be surprisingly little) to go lighter and a little less (or more pigment) to go darker.
Colors have value too
Munsell Student Color Book
Of course you don’t have to stick to black and white. Colors have value too and you could easily try mixing colors at different values. If you wish to try this I recommend buying a copy of the Munsell student color book. It contains paint chips in a range of hues of different value and chroma. You can use these to mix paint to and exact match. I haven’t found the need to do this too much. Doing the exercise in grayscale also helps you when you move to color – it really sharpens up your perception of what you see in front of you.
Sign up for updates on classes and free livestreams
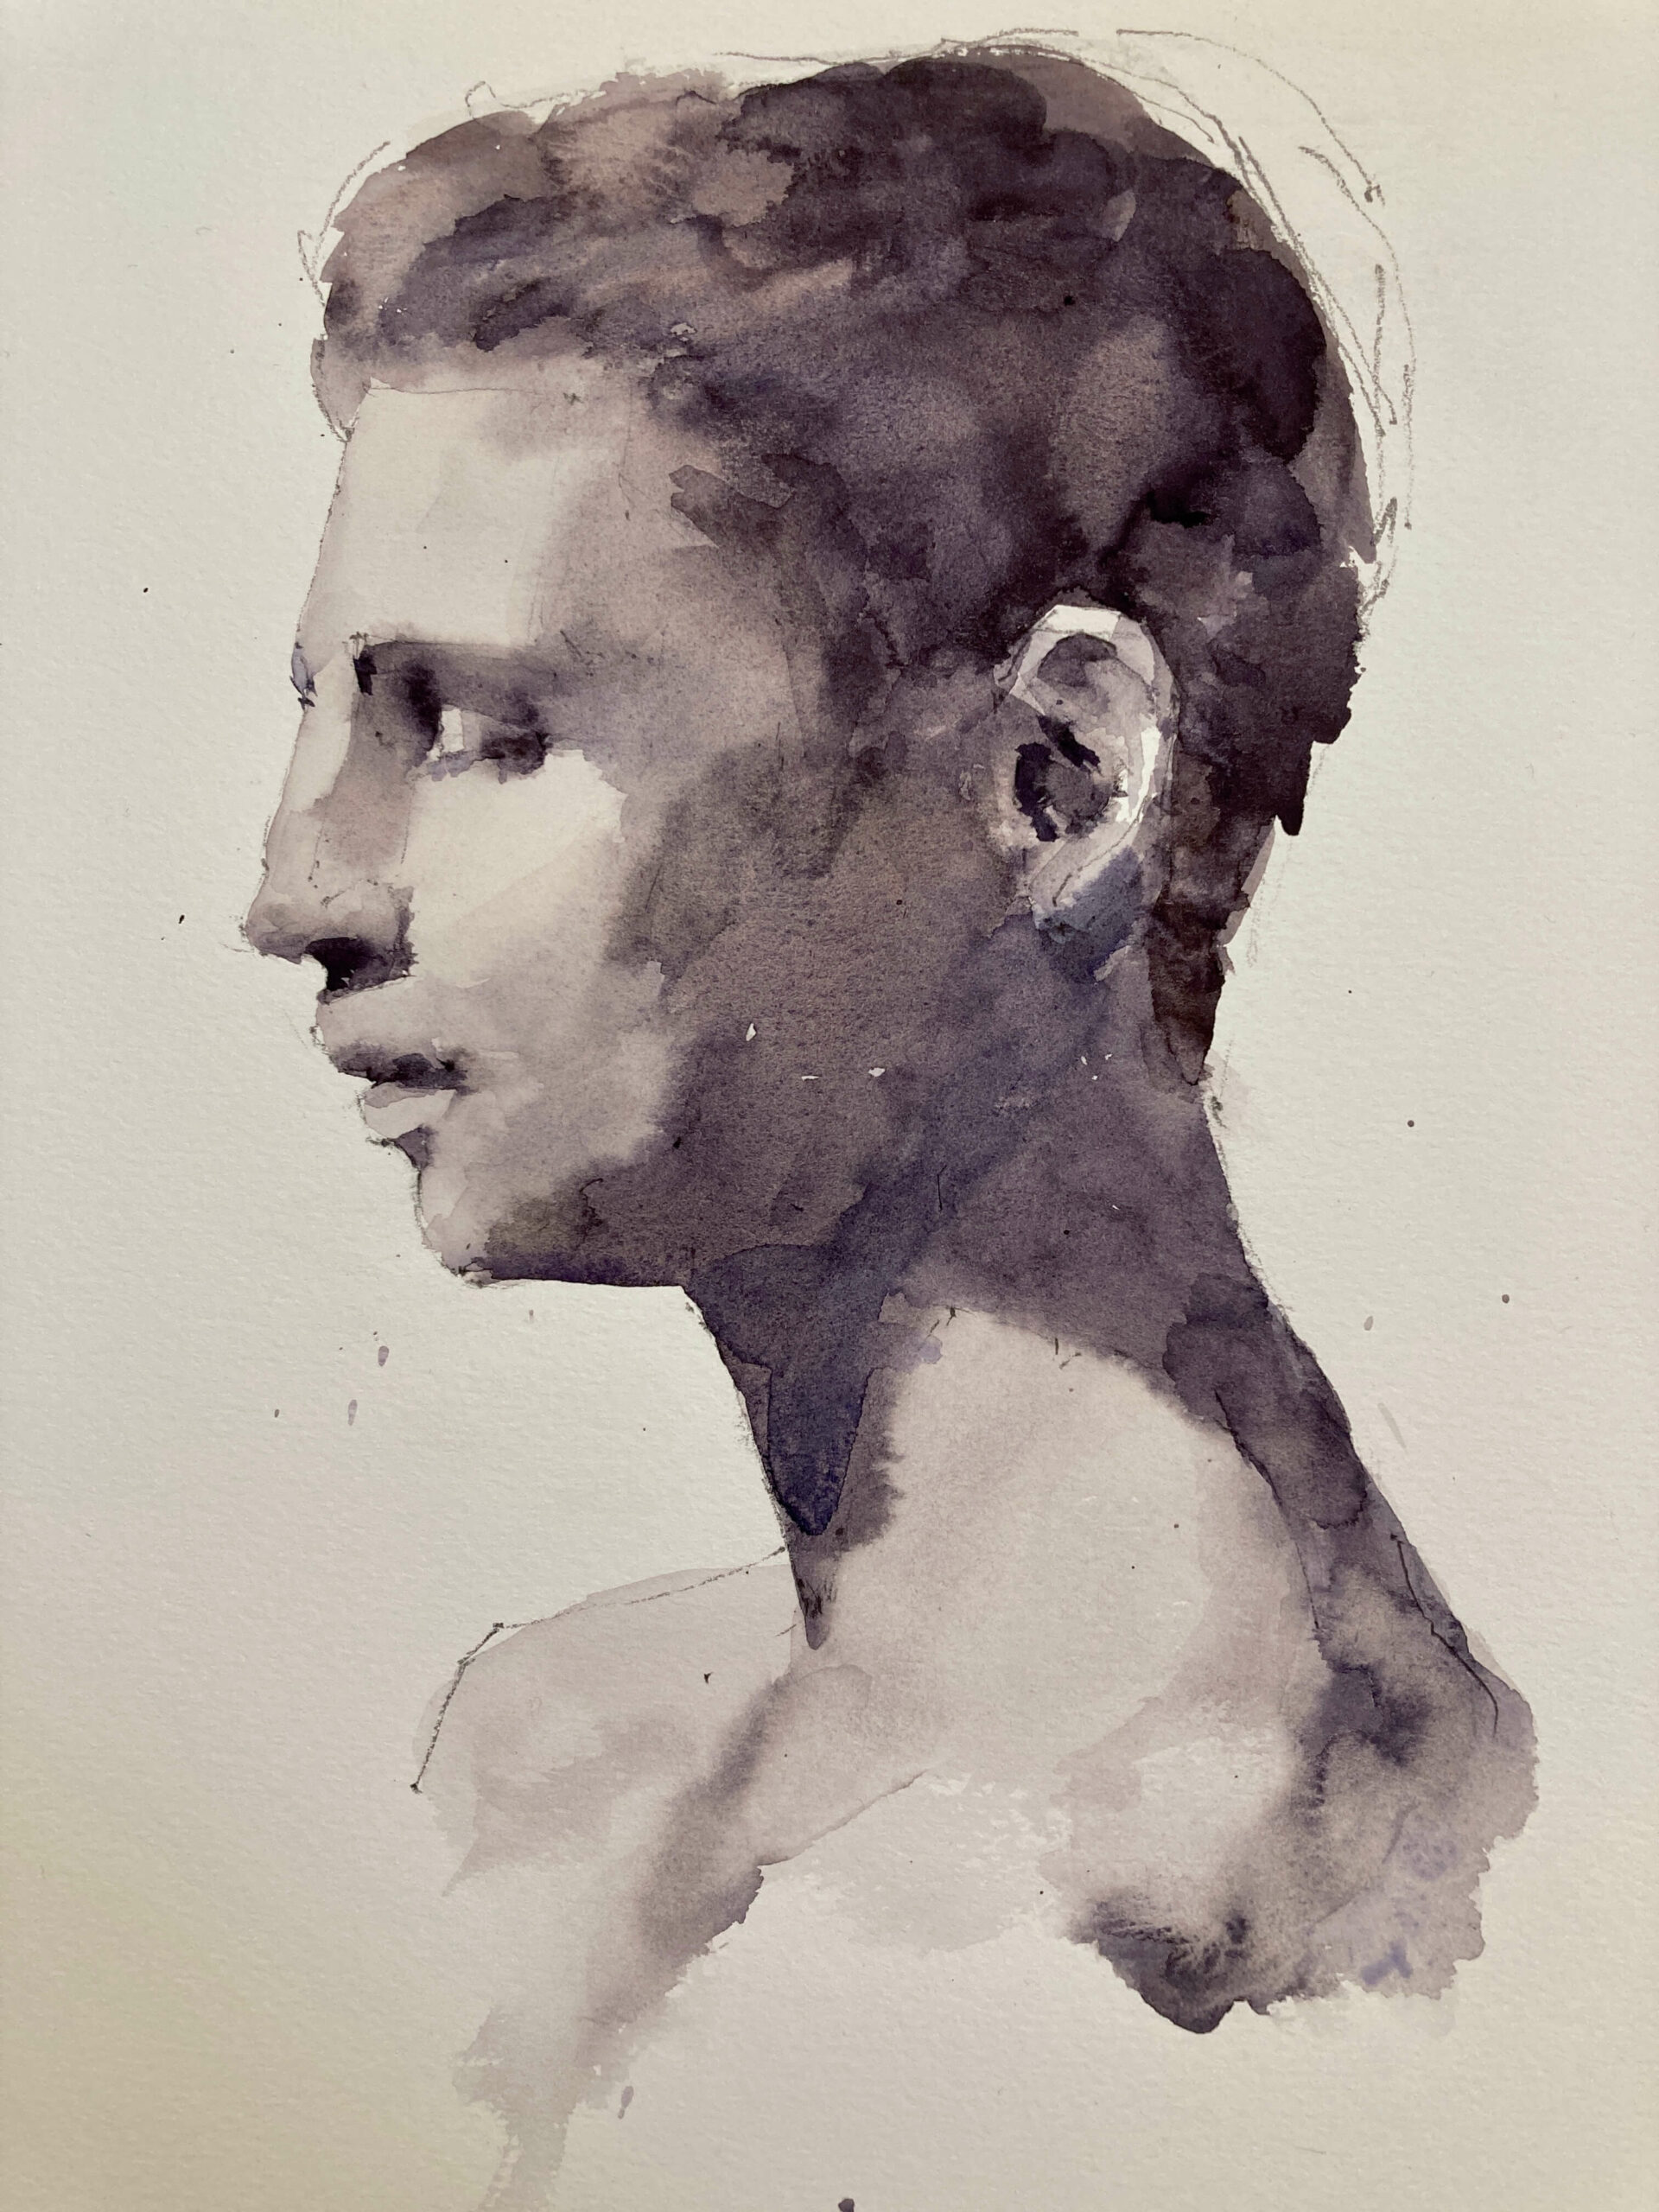
Back to the watercolor portrait – identify the value areas
So we’d done some value practice – swatches of values 1,3,5,7, and 9. Time to move onto the portrait. Before even drawing the sketch we did some analysis of the values in the face. I like to print out a reference and draw on it with a pen so I don’t forget what I’ve found. We broke down the face into different value areas. The highest values were on the forehead and the cheek and the front of the nose. The darkest values were in the hair, underneath the brow and under the nose. Other areas were the shadow on the cheek and neck and more subtle values on the temple and the skin around the mouth. There were many other finer values in the details of the facial features and in the hair which we didn’t identify. We wanted to get a broad idea of how the light fell on the form and left these to be dealt with in the actual painting.
Test yourself – guess and check the values
We’re still not painting yet! This may seem like a lot of thinking to do ahead of time and I know we all like to get stuck in and get those brushes moving. However, a little planning goes a long way, and it always results in a better painting. Try it and see!
So for each value area we took a good look and had a guess at the value. This is the most important part. Try not to just use your value scale to measure the values directly. It’s the iterative process of taking a guess and using the value scale to see how close you are. The immediate feedback you get nudges you to get better each time. And you get better incredibly quickly.
After we’d guessed and checked each value area we wrote down the number in each area. The forhead and cheek were around a 9, the cheek and neck shadow were a 4 (surprisingly dark!), the hair was around a 1 and the subtle temple, mouth, and side of the nose areas were around a 6.
Finally some painting
Finally! Well we’ve done most of the hard work now. We practiced mixing the values and we’ve practiced measuring the values. All we need to do now was put the paint on the paper.
First the lightest tones.
Using a size 12 round brush we mixed a gray to the lightest value – 9. Everything else in the painting will be darker than this so we put in a wash over the full face. Even a value 9 looks surprisingly dark on the paper – we were both surprised by this. But we’d done our homework and knew that’s what it should be so down it went.
Next the shadows
We could progress from here to the next lightest value but I prefer to put in the main shadow areas next. Thes)e aren’t the darkest darks. The darkest darks tend to be fairly small regions under the brow and nose and in the corners of the mouth. The main shadow area is the cheek and neck. This we knew was a value 4 so we mixed this up (tested a swatch to check we had the right consistency) and put in a wash over the cheek and neck. We were careful to soften the edge on the cheek to show the form – we don’t want a hard edge there. There was also a little softening on the neck edge. Using this same value we also put in a wash over the brow area and under the nose. In the reference they were darker than this but I wanted to get some color on there so we could see how the face was working. We can always darken these up later on.
Painting the hair to keep the painting balanced
I like to keep the painting balanced as it progresses. By this I mean that I don’t want any area to get left behind. It’s hard to assess the painting as a whole if you can’t see how the different areas relate to each other. The neck shadow was looking a little stark against the white paper so we put in the dark hair to see if the value was working. The hair was mostly very dark (slightly lighter towards the front) and, to my relief, it worked to tone down the neck shadow. Panic over!
Sign up for updates on ChromaMagic
The hard work is over – the final details
Even though the face was appearing it wasn’t looking like real flesh and blood. These last steps are where this happens. However, the real work was already done. It’s tempting to think that these final subtle form modifications are what makes the difference but if the main values aren’t right no amount of detail noodling will bring out the form. This part is definitely the fun part. If the previous steps are done well then it’s (almost) impossible to mess up here. We put in some lighter values on the temple and the nose and around the mouth. All the edges were softened to stop any hard edges and to show the gradual form change over the planes of the face. A little darkening under the brow and nose and a little darkening of the neck and shoulders and we were done.
The verdict
It’s par for the course that half way through a painting I say to myself that this isn’t going to work. The values look wrong, the drawing’s slightly off, I’ve messed up some of the edges etc. However the careful prep paid off and it all came together. It’s a class demo painting so it has some rough edges. I have to stop mid way through things if there’s something I want to explain further or talk about so hard edges and blossoms crept in here and there. But they don’t detract from the final effect and actually add to the painting if everything else is done well. Pretty happy with this.
(Note: As an Amazon Associate I earn from qualifying purchases.I get commissions for purchases made through links in this post.)
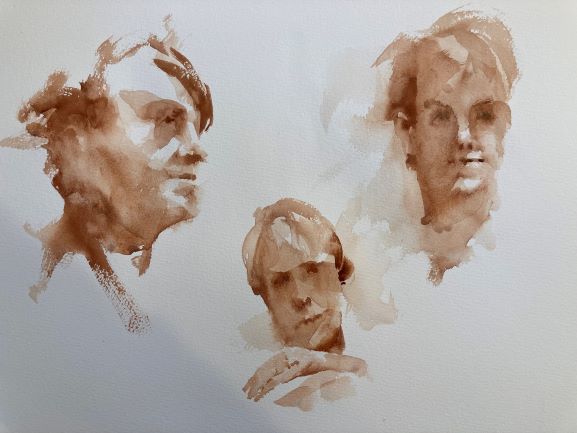
Watercolor portrait sketches are something I haven’t done in a while. A lot of other watercolor painting but very rarely faces. Portrait painting takes the difficulties of watercolor to another level. Getting the facial features right, the skin color, how the light reflects off the planes of the face – everything needs to be right. And that doesn’t even touch on how hard it is to get a good likeness.
Portraits over zoom are great!
Today was the life session courtesy of the Newton Watercolor Society. We had our wonderful model Andrea who I think I’ve painted before at a Charles Reid workshop. I was pleasantly surprised how successful it was to paint at home from the screen image. Almost made me forget I wasn’t actually in front of the model. Of course there are differences. You have one point of view (although everybody has the same view which is nice) and the camera does odd things with the exposure and the color. But on the whole I got a lot out of it.
My Portrait Skills need some work
Now you may be wondering from my portrait results where the other two models were. Actually these three faces are all of the same person. I’ve managed to not only paint people who look nothing like each other but also are of completely different ages and indeed gender. Obviously need a little practice here.
The Process
I was working on Fabriano Artistico 140lb cold press paper and worked entirely with burnt sienna. Using a round brush I initially washed in the main values leaving the paper white for the light parts of the face. Initally I just put shadow in the eye areas and around the mouth and left any details until later. We only had a time of 15 minutes per portrait so things had to go fast. This meant any detailed treatment of the eyes or hair had to be skipped over. I worked wet in wet mostly – partly due to time and partly to not end up with any hard edges. It was extremely enjoyable and the time just whizzed by. On the whole I’m pretty happy although I obviously need to work on doing more observation of those fine feature distinctions.
Just a quick post from today’s class. Why oh why didn’t I plan out the drawing better!!! Almost lost the whole thing but managed to scrape something back by the end.
Today was an Henri Lehmann Clementine portrait in watercolor. The original is oil but I went crazy and tried it in watercolor. The likeness (as always) is off but it has something I think. Many thanks to Julie Beck for introducing me to this painting.
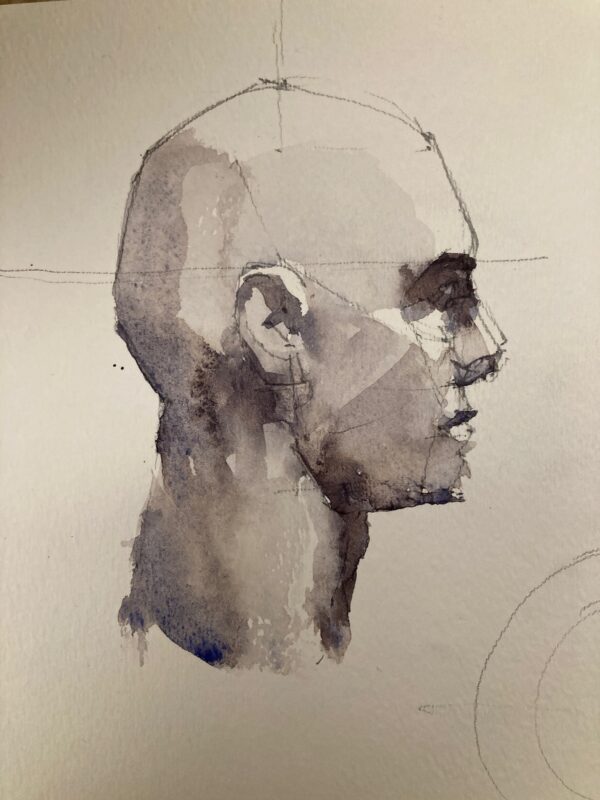
It’s been a while since I’ve done any portrait painting. Getting warmed up by doing some Asarohead practice. Very useful to have the planes clearly shown. A bit like painting a very complicated cube.
Online Asaro Head
There’s a great online 3D head by William Nguyen at Artstation. It’s not an exact Asaro head but has the main planes and is very similar. You can rotate it using the mouse and the lighting moves around the head so you can pause the video at the exact pose and lighting setup you need.