Watercolor Toucan

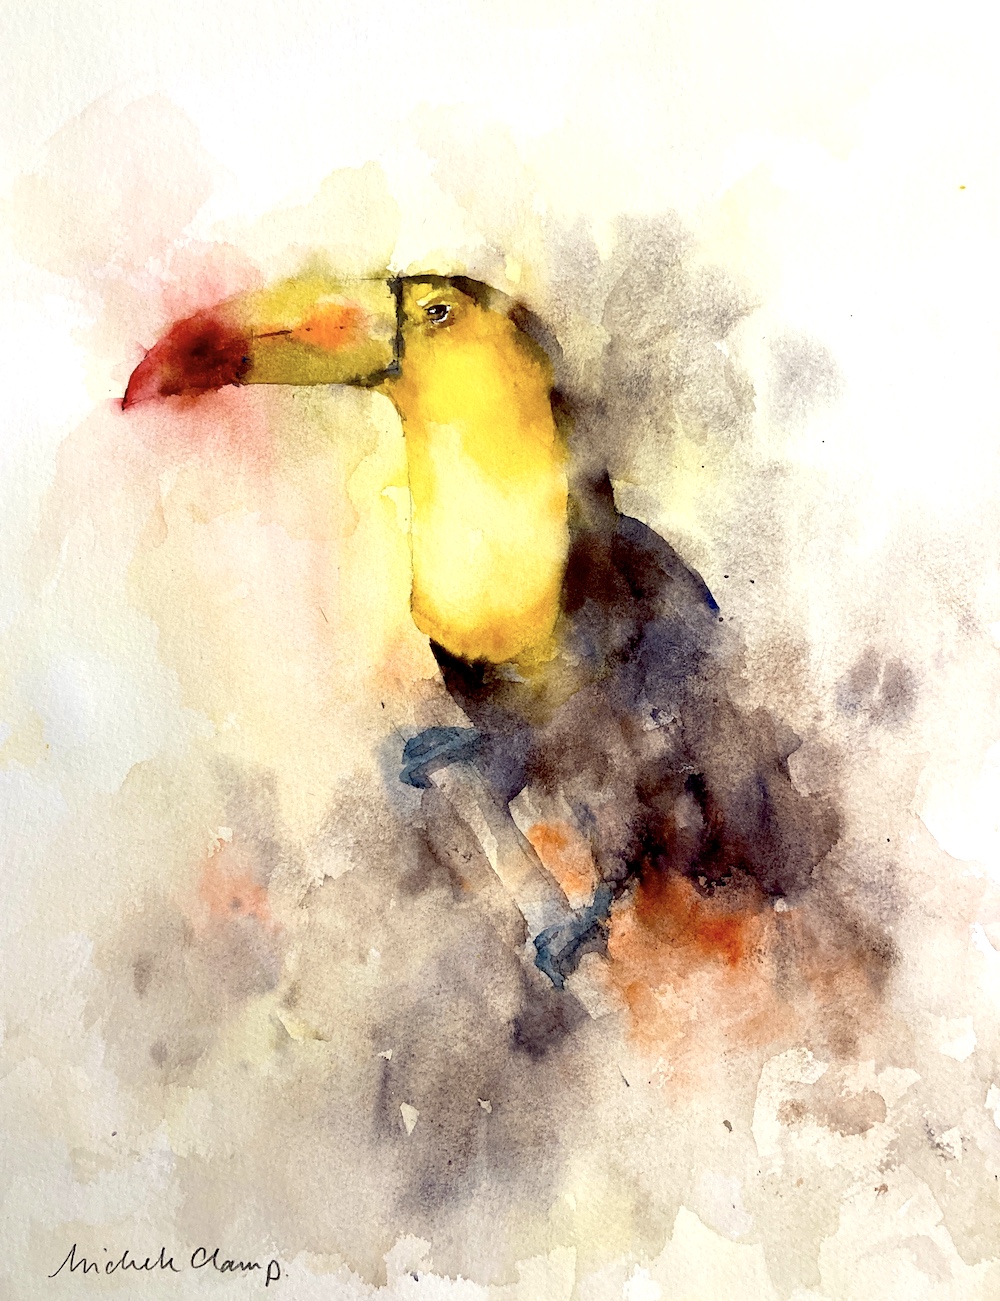
Painting a watercolor toucan was the subject today. Exotic tropical birds are often highly colorful which is very attractive but can pose some problems in paint. Each color needs to be modified as the from turns from the light into the shadow. This means a lot of close observation and a lot of mixing. However, for this reference I decided to simplify the colors a little. There was a lot of pretty bright green and yellow in the reference. I chose to tone down the green and also move the greenish yellow more towards orange. The aim was to have more unified color scheme. I also decided to ditch the jungle of foliage. For another painting this could have been fun to do but I wanted to focus in on the toucan bird and not have anything competing with it.

Sign up for updates on classes and free livestreams


First make a plan

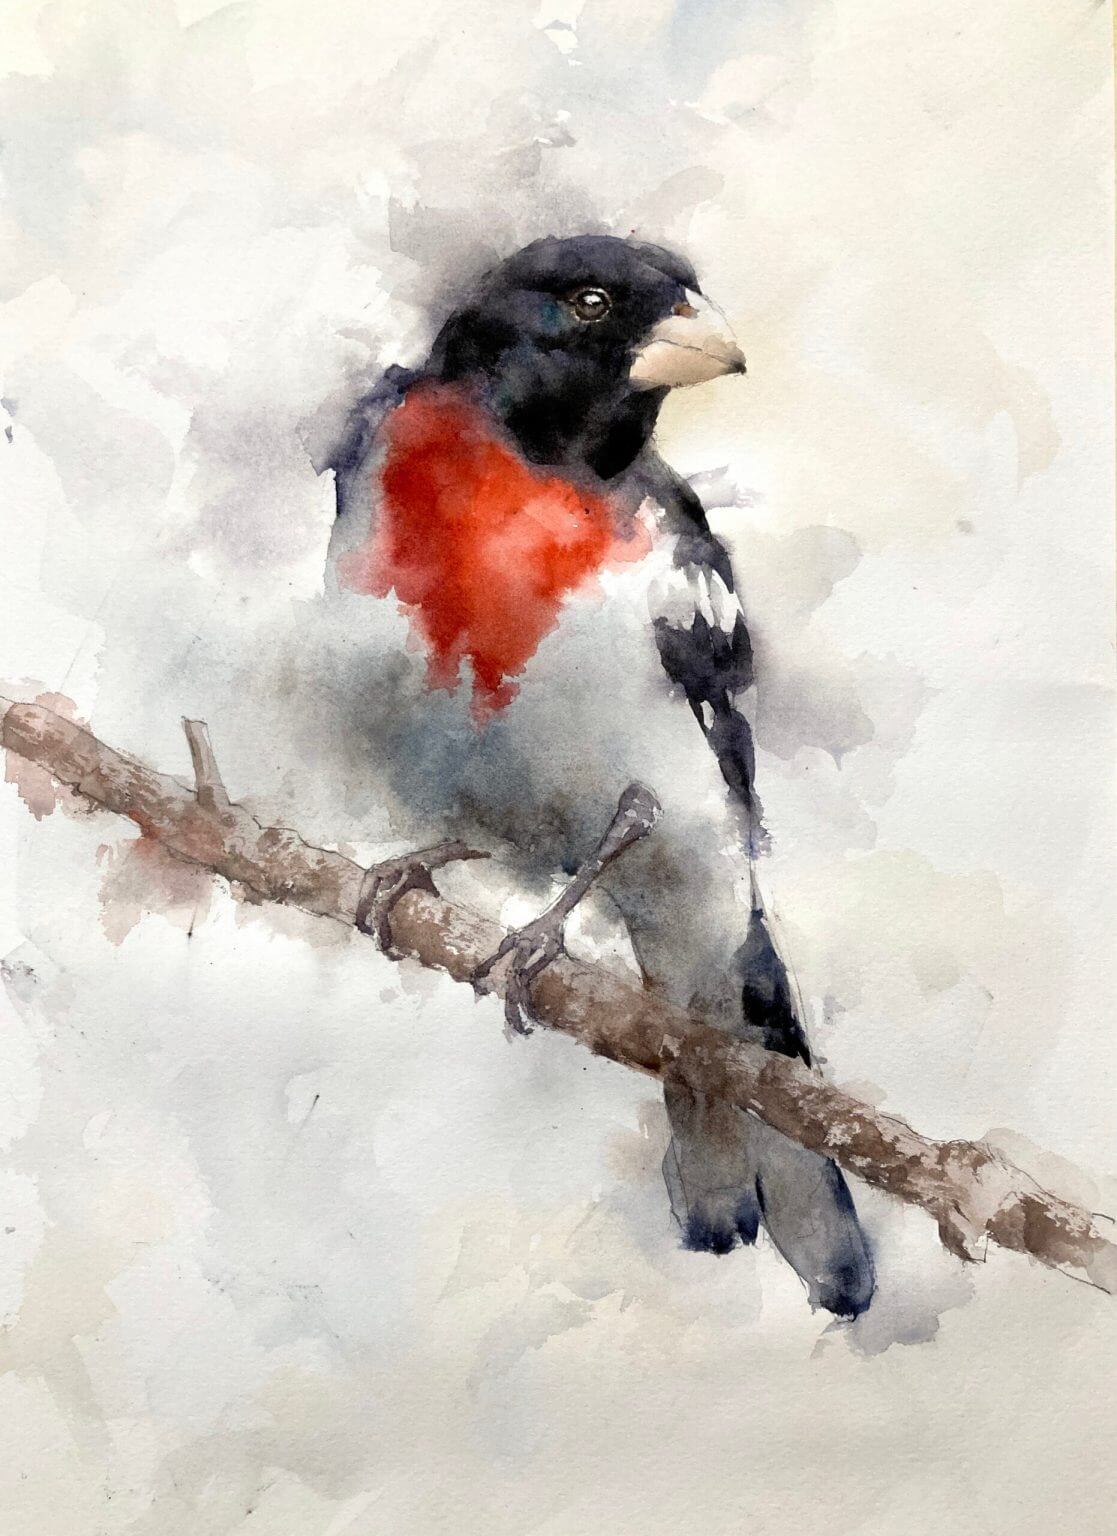
The plan for this bird watercolor was to proceed along the same lines as a previous cardinal watercolor painting. I wanted to start by putting down lots of regions of soft edged misty color and not pay too much attention to the edges. As the painting progresses more and more edges are put in until the bird magically appears from the mist. It’s a fun way to paint and I really like the resulting effect. It’s a technique very well suited to bird art and you can end up with an almost abstract painting at the end.

Materials for your Watercolor Toucan

It’s pretty much essential to work on good 100% cotton watercolor paper for this. The paper can take a lot of working and also keeps damp for a fair while. This allows us to work into the paint wet-in-wet and soften edges as we go. It is possible to use cheaper paper but I wouldn’t recommend it unless you have a lot of experience under your belt. Trust me – I’ve learned this the hard way. My favored paper is Fabriano Artistico 140lb cold press but any cold press 100% cotton paper is fine. Arches can be a good choice for this. It is slightly more absorbent than the Fabriano and so stays damp for longer. This gives us more time to think as we’re painting without that panic that we have to get everything done at top speed.

A couple of good brushes are needed. I use Escoda reserva sizes 12,10 and 8. They point well and hold a lot of water. However a good synthetic (Princeton Aqua Elite, Black Velvet or Escoda Versatil) is fine and there isn’t so much sticker shock.

For paint I use mainly Da Vinci with a sprinkling of Holbein, Winsor and Newton, Daniel Smith and a couple of others. Any artists quality paint is good and some student paint is also fine (Cotman or Lukas Studio work well). My colors are lemon yellow, cadmium orange, vermillion, permanent rose, burnt sienna, cerulean blue, ultramarine and lamp black.

We can work without stress on preliminary sketches

These two sketches were just to get the brushes warmed up and to play with the colors and the shapes. I mostly wanted to see how much detail I could lose but still keep the essence of the bird. It turned out that the chinstrap was a big focal point. A surprise was that keeping the beak too sharp really detracted from the rest so I made a note to be careful about keeping a lot of that beak soft.

Keep the Drawing simple

loose watercolor toucan drawing

As we’re going to be working loosely on this watercolor bird I don’t want too much graphite showing through. So the drawing was kept light and only the most essential lines put in. I lightly outlines the beak, the eye, the rough shape of the body and the legs and feet. For the feet I just drew in the main shape and didn’t bother noodling around drawing individual claws. They’re not the main focus and will just distract the viewer.

First washes – go nuts with those edges

This first bit is lots of fun and is really hard to go wrong here. I took the main colors (mostly lemon yellow for the chest and beak and a mix of ultramarine/burnt sienna for the body) and just sploshed some paint in the rough area they should be. Use a big brush for this – we don’t want little dibby dabby lines at this point.

Once the paint dabs were down I thoroughly cleaned my brush, loaded it up with water and softened all the hard edges of the paint. Don’t be afraid of painting through the edges here. In fact really try and pull that paint through the outline of the bird into the background. Keep loading up with water and soften anything that looks like a hard edge – it should look nothing like a bird at this point!!

Careful of the eye area

The only thing to be careful of is the eye area. We want to keep that area nice and crisp so try and keep dark paint away from that area. If, by chance, you do paint over it by mistake you can probably take a piece of paper towel and lift the paint off while it’s wet.

Slosh in some dark mixes for the body area

With my mix of ultramarine and burnt sienna I started putting in marks rough where the body was going to be. Again I pulled that color out through the edges of the bird into the background. Even pull it through the feet – these are fairly dark anyway and we can paint over them later. If you want to splatter some darks inot the wet paint go ahead. It will add some texture and visual interest. Just keep those edges soft! There shouldn’t be a hard line to be seen.

Sign up for updates on classes and free livestreams


Wait a bit

Now is a good time to take a quick break and let the paper dry a little. It’s probably quite wet from all that sloshing and we need it to be almost dry for the next step.

Now the edges of Your Watercolor Toucan!

This to me is the magical part. We’re going to go in with some thicker paint (ultramarine and burnt sienna) and start putting in some edges. My aim is to put in as few edges as possible but still have it read as a toucan. I’m always surprised how few you really need.

I start by identifying what I think are the main areas of contrast to put in. The chin-strap around the beak is an obvious one as is the edge of the black feathers next to the yellow chest feathers. But you don’t need to outline the whole thing. Try just putting some paint in a couple of areas (soften the other side) and see how it reads. Our brains will often fill in the gaps. And if you feel it’s too harsh use a clean brush and soften it back again. We can always add hard edges but it’s tough to remove them once they’re down and dry.

More edges – but just enough

The body and face take shape.  Keep the eye crisp
The body and face take shape. Keep the eye crisp

I go around the bird adding in edges where I need them. It turned out in this one that it really didn’t need many at all. It can be hard to stop but better to stop too early rather than too late.

Details and Form in your Watercolor Toucan

painting a watercolor toucan
Add in some detail for the feet and beak

This final bit is where it all comes alive. We can put in the eye (with a little shadow around it), some color and shadow on the beak and some shadow on the yellow chest feathers. A little color and shadow for the feet and we’re pretty much done. This bit looks like the fancy bit but, as with a lot of painting, the main work is done ahead of time. These pieces are just icing and no amount of fiddling at this stage will fix mistakes made earlier.

Stand back and assess

When the details are in then take a breather, stand back and see if the whole thing hangs together. There may be odd bits that stand out too much or don’t stand out enough. But don’t noodle too long. It’s tempting to fiddle for ages but less is definitely more here. It’s so easy to ruin something that’s working with unnecessary detail.

Watercolor Toucan – the Verdict

I’m pretty happy with this toucan watercolor. I like the shapes, there’s just the right amount of definition, and the bird has some dignity to him. It’s very different from my previous work and doesn’t look like a slightly cartoonish illustration.

Sign up for updates on classes and free livestreams


Watercolor Toucan Video

The full recording is viewable below.

YouTube player

While you’re here

I like to do video demos and classes and if you want to be notified of any upcoming streams please subscribe to my youtube channel or sign up for my mailing list. I also frequently update my shop page with original artwork if you’d like to own a painting for your wall.

Watercolor Penguins Finished

Well they’re finished. Probably a little tidying up to do tomorrow but almost ready to go on the wall.

A few intermediates.

Rose-Breasted Grosbeak Watercolor

This rose-breasted grosbeak watercolor is painted loosely and is all about the edges. The full process is shown in these videos of a cardinal and a toucan but I’ll describe it briefly here.

Start with a Drawing for the Rose-Breasted Grosbeak Watercolor

First draw out the grosbeak in pencil. Nothing too soft as we don’t want the graphite to smudge and muddy up the painting. I find an HB in a mechanical pencil is good for this. While I’m drawing I’ll be thinking about which areas I want to keep sharp and which areas won’t need as much definition. In this case the face and beak will be sharp and will be the main focus of the painting.

Other areas like the belly region and the tail aren’t quite so important to define. I’ll put these in lightly with the pencil, or, in the case of the belly area maybe not draw them in at all. I’ll also be careful of the feet. It’s tempting to go nuts here and draw in every talon but I find it’s better to keep them simple. Draw the feet in a single shape if possible and only lightly indicate the claws.

The First Layer of Watercolor is Light and Watery

The first layer in this watercolor grosbeak is to put in some color but not to define any edges whatsoever. I mix up light valued (8 or 9) washes of the underlying colors and put them in roughly in the relevant regions. In this case some dabs of red on the breast, some gray underneath the belly where it’s in shadow and some slightly darker grey on the tail and wings and head. Once the dabs of color go down I take a clean brush with some water and *really* pull that color out into surrounding areas. I go right through the edges of the bird and keep adding water so the color fades to nothing.

This First Layer Feels Like You’re Going Wrong – You’re Not!

This layer really feels odd. Pulling all that color through the edges feels like you’re destroying all the drawing but trust me – you’re not. As long as that color is at the top of the value scale and all the edges are softened with water you’ll be fine. It may look dark when you put it down but it will dry back much lighter and will hardly register once you’re done.

But Keep Away from the Face!

While you’re doing all this make sure you don’t go through the face by accident. We want to keep the contrast high in this region so make sure you leave the paper white here. If you do brush through this by accident (it’s easy to do) just take some paper towel when the paper is wet and lift some of the paint. If you catch it quickly enough most should lift off.

The Second Layer we Define the Form of the Bird

Once the first layer is dry we can go in and put in our stronger colors. In this layer we’re going to define the shape and form of the bird. Using stronger colors (about a value 5 for the red and a 2 or 3 for the darks) go in and start defining some of the edges. But we don’t need to define them all! We leave the belly pretty undefined and also parts of the shoulder and wing. Start by putting in a couple of edges and see what it looks like. Keep adding in color until the bird starts to appear.

Don’t Add Too Many Edges in your Rose-Breasted Grosbeak Watercolor

Keep standing back and looking at your painting after every edge you put in. Once the bird starts to appear be careful! We don’t want to overdefine things. Don’t make the outline too sharp-edged. Your painting will be more realistic, convincing and, frankly, better if you stop before everything is filled in. It’s tricky – better to stop too early than too late.

Define the Face and the beak.

We not put in the face, eye and beak for our rose-breasted grosbeak watercolor. When we do this the whole thing usually comes alive. We need a little contrast here and leaving some light sparkles of paper showing through helps give the whole painting life. I always like to leave a small piece of paper showing through for the highlight of the eye – it gives the bird some life and personality. The beak is a tricky color. It’s very light and a grayed down peach color. Try not to make it too bright orange. Add in a little black with some water to gray down the color.

The Feet and Branch

I have to admit I have a problem with bird feet. I tend to paint them with too much contrast and they draw the eye and make the whole thing rather jarring. so try and keep them muted. Not too much light and shadow and don’t make them that much darker than the branch. And the branch itself shouldn’t draw the eye. We use a brownish mixture of ultramarine and burnt sienna for the branch but there are a lot of soft edges. Again, sharply defined lines draw the eye. Keeping things soft and a little ill-defined makes the painting more interesting and convincing.

Final Touches for your Rose-Breasted Grosbeak Watercolor

Now is the time to sharpen up some areas that need it. The head usually needs a little darkening and this can emphasize some subtle value changes around the face. The feet may need a little extra definition and some areas may need some extra color to emphasize the form. But the changes should be small. And again, much better to stop early than keep on and ruin the whole thing with an ill-advised change.

Day 11 of 30 in 30 – Nesting Herons

Nesting Herons. Michele Clamp. Watercolor. 11″x14″

I wanted this to be pretty loose. Lots of lost edges with defined detail in the faces. I’m pretty happy so far but it will have to live on the easel until I know for sure.

Standing Blue Heron Watercolor

This was the last demo in this terms classes and day 1 of the 30 in 30. I really liked the contrast between the dark and light blues and the subtle shading on the neck. I really enjoy the classes and, even over zoom, it’s nice painting with a group of people. Having said that it will be nice to have some more time for my own work and hopefully paintings will be coming thick and fast in the next couple of months